Manual
The ODIN Unity SDK provides some prefabs and components that allow you to quickly embed true 3D positional real-time audio into your game with ease.
We also provide sample code within the SDK and some Github repositories.
Setup
After installing the SDK you need to setup a couple of ODIN components in your scene.
Using Prefabs
In Packages/4Players ODIN/Runtime you find the OdinManager prefab. Drag & Drop that into your scene.
We also provide a couple of prefab variants, depending on your use-case. After installing the Unity SDK package you should also install the samples.
You’ll find the samples in the /Samples/4Players ODIN/__VERSION__/Examples folder in your Assets. We have created a couple
of Odin Manager prefabs for different use-cases like 3D Audio. Drag them into your scene.
Create ODIN Manager manually
If you do not want to use our prefabs, you can also create an Odin Manager yourself. Follow these steps:
- Create an empty Game Object
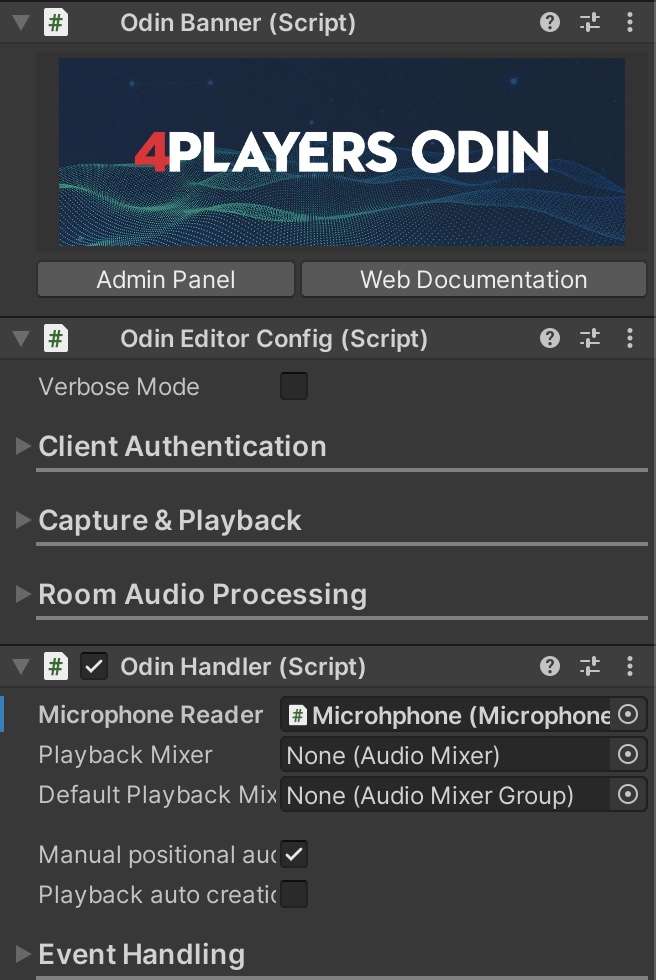
- Optional: Add the Odin Banner component which will show a nice banner in your editor window that allows you to easily identify the ODIN Manager if you have a larger scene. And more importantly it looks cool ;-).
- Add the Odin Editor Config component to the game object.
- Add the Odin Handler component to the game object.
- Add the Microphone Reader component to the game object.
The ODIN Manager
After you have dropped one of our prefabs into your scene or created the ODIN Manager Game Object yourself, you should see this in the Unity Inspector:
The ODIN Manager should be used for setting up ODIN in your game (i.e. sample rates or which microphone should be used) and it will also handle all the heavy lifting:
- Generating access tokens so that players can connect to our ODIN servers
- Managing ODIN events and exposing them in your project
- Initialization of audio pipelines
- Capture audio input from microphones and pushing audio data to ODIN runtime
The ODIN Manager typically consists of three parts:
- The Odin Editor Config component for basic ODIN settings
- The Odin Handler component that does event handling and allows you to connect callbacks
- The Microphone Reader component that captures audio input
It’s not required to put all these components into one component, for example you can put the Microphone Reader component on another game object if you like but it’s typically easier if everything is in one place.
Let’s start digging through the inspector properties available in the Odin Editor Config .