Swift
OdinKit is a Swift package providing an object-oriented wrapper for the ODIN native client library, which enables developers to integrate real-time VoIP chat technology into multiplayer games and apps on macOS and iOS.
Requirements
- iOS 9.0+ / macOS 10.15+
- Xcode 10.2+
- Swift 5.0+
Source Code
The Swift SDK is based on our C Core API and is open source. Check out the source of this Swift wrapper in our public Github repository.
Sample
Check out our SwiftUI sample built with OdinKit. It’s open source and should get you started quickly: SwiftUI Sample at Github.
Documentation
We provide a doccarchive file that you can import into Xcode to get access to the documentation in Xcodes
documentation browser. Just download the file and double click to install:
OdinKit.doccarchive
Installation
The ODIN SDK is provided as written in Swift and bundled in an XC Framework. Follow these steps to add it to your application.
1. Download and extract
Download the Framework and extract the ZIP file somewhere on your hard drive.
2. Add the package to your workspace
In XCode, choose Add Packages… in the File menu. A new window appears.
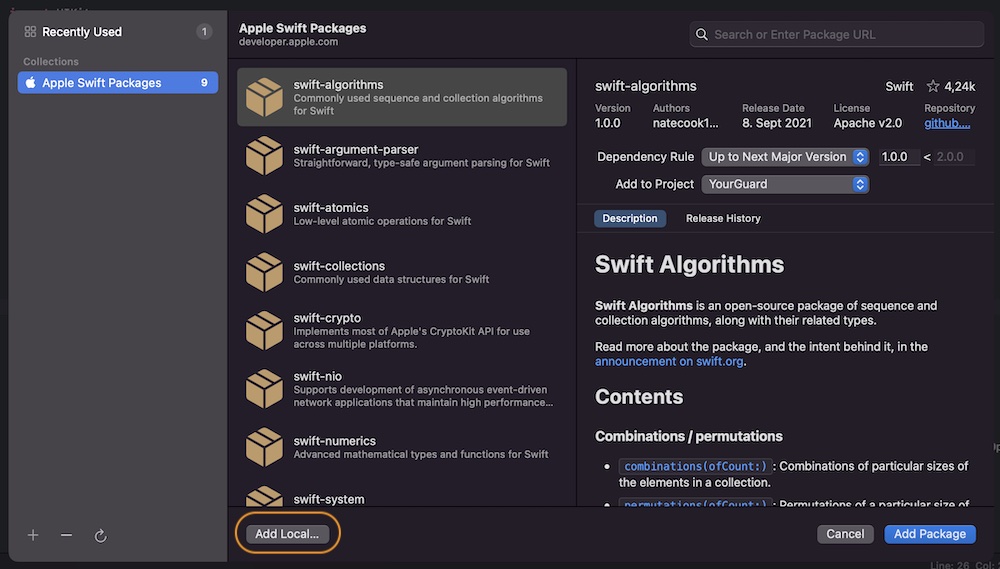
Adding a Swift package
Click on Add Local and you’ll be able to choose a framework located on your disk. It’s a standard macOS file selection dialog. Navigate to the folder you extracted (i.e. OdinKit) and click on “Add Package”;
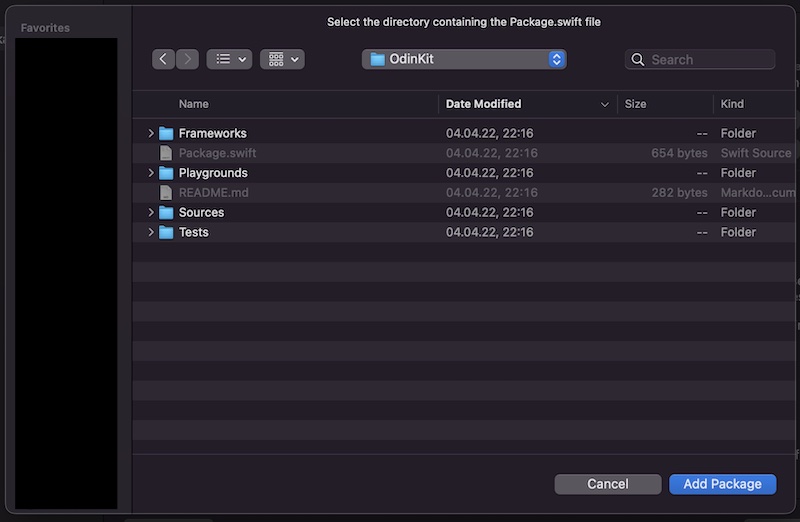
Choose local extracted package
That’s it. In your project navigator in XCode you should see OdinKit show up under the Packages tree item.
3. Build settings
Finally, we need to link the OdinKit package. In XCode, in the project navigator, select your project file and choose the correct target. Navigate to the General tab and scroll down to Framework, Libraries and Embedded Content.
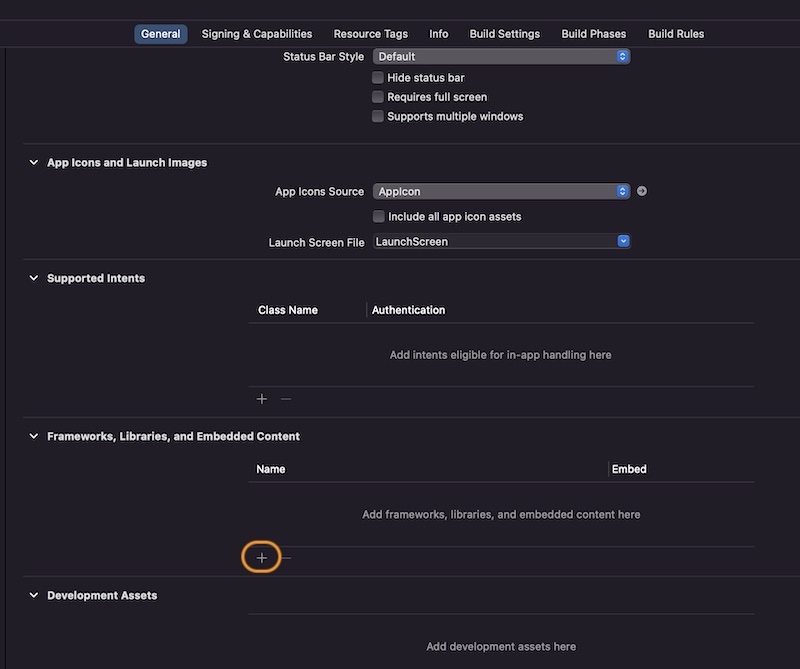
Choosing the OdinKit framework folder previously extracted
Click on the + icon and select the OdinKit framework in the list as shown in this image:
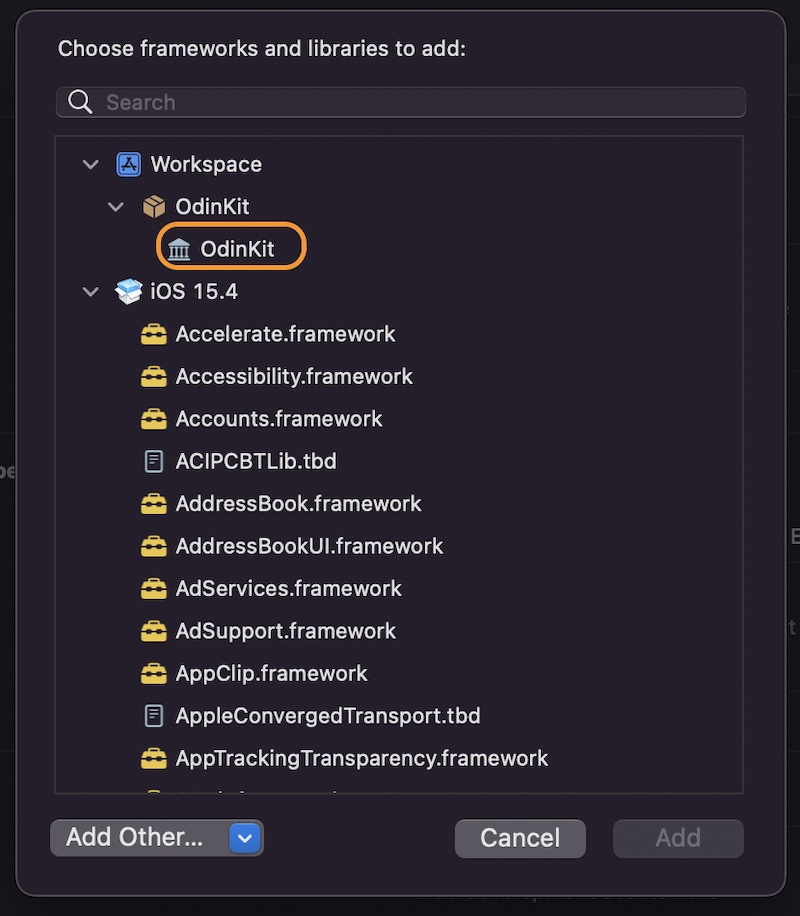
Select OdinKit Framework
Playgrounds
We have included a couple of Playgrounds into the OdinKit framework to get started quickly:
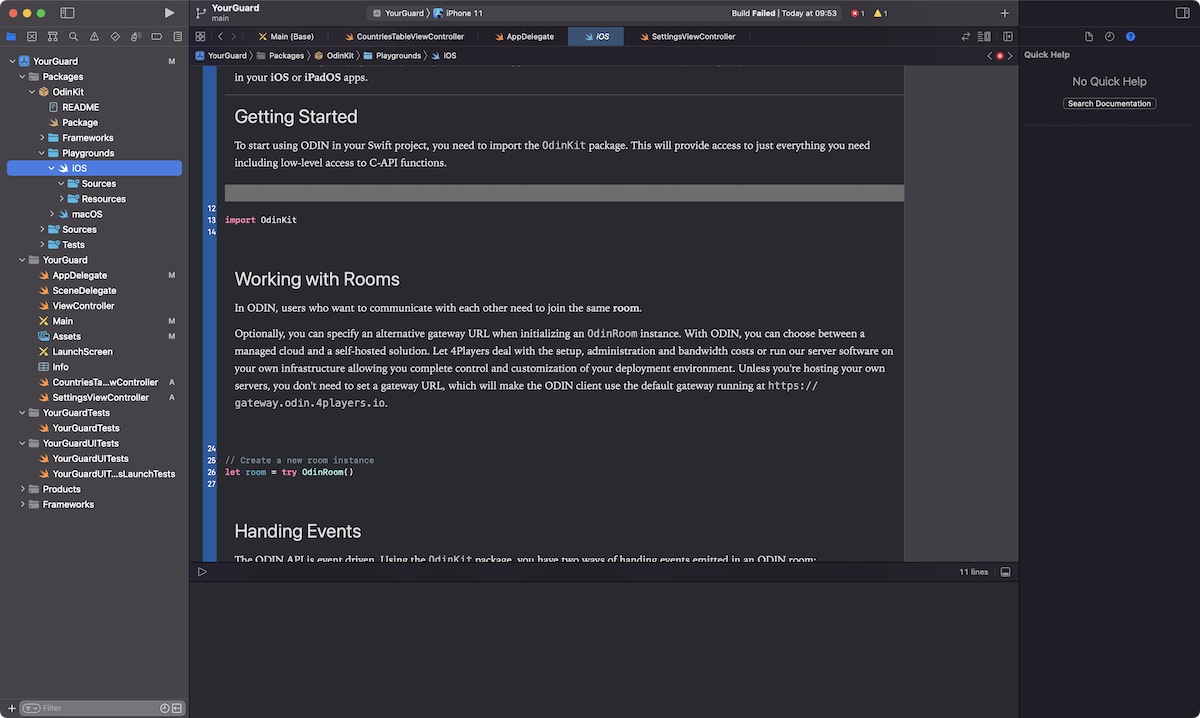
Swift Playgrounds
In the project navigator, expand the OdinKit framework under packages, choose Playgrounds and then either iOS or macOS.
Check out the Playground Source here if you are interested: OdinKit macOS Playground at Github
Quick Start
The following code snippet will create a token for authentication, join a room called “Meeting Room” and add a media stream using your default audio input device:
import OdinKit

let room = OdinRoom()

do {
    let accessKey = try OdinAccessKey("<YOUR_ACCESS_KEY>")
    let authToken = try accessKey.generateToken(roomId: "Meeting Room")

    try room.join(token: authToken)
    try room.addMedia(type: OdinMediaStreamType_Audio)
} catch {
    print("Something went wrong, \(error)")
}
Class Overview
OdinKit provides a set of classes to provide easy access to just everything you need including low-level access to C-API functions of the ODIN Core SDK.
OdinAccessKey
An access key is the unique authentication key to be used to generate room tokens for accessing the ODIN server network. You should think of it as your individual username and password combination all wrapped up into a single non-comprehendible string of characters, and treat it with the same respect. For your own security, we strongly recommend that you NEVER put an access key in your client-side code. We’ve created a very basic Node.js server here, to showcase how to issue ODIN tokens to your client apps without exposing your access key.
Note: Using the OdinAccessKey default initializer will always create a new access key.
// Create a new access key
let accessKey = OdinAccessKey()

// Print information about the access key
print("Public Key: \(accessKey.publicKey)")
print("Secret Key: \(accessKey.secretKey)")
print("Key ID:     \(accessKey.id)")
OdinToken
ODIN generates signed JSON Web Tokens (JWT) for secure authentication, which contain the room(s) you want to join as well as a freely definable identifier for the user. The later can be used to refer to an existing record in your particular service.
As ODIN is fully user agnostic, 4Players GmbH does not store any of this information on its servers.
// Generate a token to authenticate with
let authToken = try accessKey.generateToken(roomId: "foo", userId: "bar")
OdinRoom
In ODIN, users who want to communicate with each other need to join the same room. Optionally, you can specify an
alternative gateway URL when initializing an OdinRoom instance.
You can choose between a managed cloud and a self-hosted solution. Let 4Players GmbH deal with the setup, administration and bandwidth costs or run our server software on your own infrastructure allowing you complete control and customization of your deployment environment. Unless you’re hosting your own servers, you don’t need to set a gateway URL, which will make the ODIN client use the default gateway running in the European Union.
// Create a new room instance
let room = OdinRoom(gateway: "https://gateway.odin.4players.io")

// Join the room
let ownPeerId = try room.join(token: authToken)

// Print information about the room
print("ID:        \(room.id)")
print("User Data: \(room.userData)")
OdinPeer
Once a client joins a room, it will be treated as a peer. Every peer has its own user data, which is a byte array
([UInt8]). This data is synced automatically, which allows storing of arbitrary information for each individual peer
and even globally for the room if needed.
Peers can update their own user data at any time, even before joining a room to specify the initial user data value.
// Print information for all peers in the room
for (peerId, peer) in room.peers {
    print("ID:        \(peer.id)")
    print("User ID:   \(peer.userId)")
    print("User Data: \(peer.userData)")
    print("Is Self:   \(peer == room.ownPeer)")
}
OdinMedia
Each peer in an ODIN room can attach media streams to transmit voice data. By default, ODIN will always assume that your
input device is working with a sample rate of 48 kHz. If you need to change these settings, you can either specify a
custom OdinAudioStreamConfig or attach the OdinMedia instances of your room to an existing AVAudioEngine instance
of your app.
// Append a local audio stream to capture our microphone
let newMediaId = try room.addMedia(audioConfig: OdinAudioStreamConfig(
    sample_rate: 48000,
    channel_count: 1
))
Event Handling
The ODIN API is event driven. Using the OdinKit package, you have two ways of handing events emitted in an ODIN room:
a) Setting a Room Delegate
Every OdinRoom instance allows setting an optional delegate to handle events. The delegate must be an instance of a
class implementing the OdinRoomDelegate protocol, which defines all the necessary event callbacks.
// Define a class handing events
class YourCustomDelegate: OdinRoomDelegate {
    // Callback for internal room connectivity state changes
    func onRoomConnectionStateChanged(room: OdinRoom, oldState: OdinRoomConnectionState, newState: OdinRoomConnectionState, reason: OdinRoomConnectionStateChangeReason) {
        print("Connection status changed from \(oldState.rawValue) to \(newState.rawValue)")
    }

    // Callback for when a room was joined and the initial state is fully available
    func onRoomJoined(room: OdinRoom) {
        print("Room joined successfully as peer \(room.ownPeer.id)")
    }

    // Callback for room user data changes
    func onRoomUserDataChanged(room: OdinRoom) {
        print("Global room user data changed to: \(room.userData)")
    }

    // Callback for peers joining the room
    func onPeerJoined(room: OdinRoom, peer: OdinPeer) {
        print("Peer \(peer.id) joined the room with ID '\(peer.userId)'")
    }

    // Callback for peer user data changes
    func onPeerUserDataChanged(room: OdinRoom, peer: OdinPeer) {
        print("Peer \(peer.id) updated its user data to: \(peer.userData)")
    }

    // Callback for peers leaving the room
    func onPeerLeft(room: OdinRoom, peer: OdinPeer) {
        print("Peer \(peer.id) left the room")
    }

    // Callback for medias being added to the room
    func onMediaAdded(room: OdinRoom, peer: OdinPeer, media: OdinMedia) {
        print("Peer \(peer.id) added media \(media.id) to the room")
    }

    // Callback for media activity state changes
    func onMediaActiveStateChanged(room: OdinRoom, peer: OdinPeer, media: OdinMedia) {
        print("Peer \(peer.id) \(media.activityStatus ? "started" : "stopped") talking on media \(media.id)")
    }

    // Callback for medias being removed from the room
    func onMediaRemoved(room: OdinRoom, peer: OdinPeer, media: OdinMedia) {
        print("Peer \(peer.id) removed media \(media.id) from the room")
    }

    // Callback for incoming arbitrary data messages
    func onMessageReceived(room: OdinRoom, senderId: UInt64, data: [UInt8]) {
        print("Peer \(senderId) sent a message with arbitrary data: \(data)")
    }
}

// Create an instance of your delegate
let delegate = YourCustomDelegate()

// Add the delegate to the room
room.delegate = delegate
b) Using Published Properties
Every OdinRoom instance provides a set of observable properties using the @Published property wrapper. This allows
you to easily monitor these variables as signals are emitted whenever their values were changed.
There are three distinct properties you can observe:
OdinRoom.connectionStatus
This is a tuple representing current connection status of the room including a reason identifier for the last update.OdinRoom.peers
This is a dictionary containing all peers in the room, indexed by their ID. Each peer has its ownuserDataproperty, which is also observable and stores a byte array with arbitrary data assigned by the user.OdinRoom.medias
This is a dictionary containing all local and remote media streams in the room, indexed by their stream handle. Each media has an observable property calledactivityStatus, which indicates wether or not the media stream is sending or receiving data.
// Monitor the room connection status
room.$connectionStatus.sink {
    print("New Connection Status: \($0.state.rawValue)")
}

// Monitor the list of peers in the room
room.$peers.sink {
    print("New Peers: \($0.keys)")
}

// Monitor the list of media streams in the room
room.$medias.sink {
    print("New Medias: \($0.keys)")
}
Audio Processing
Each ODIN room handle has its own audio processing module (APM), which is in charge of filters like echo cancellation, noise suppression, advanced voice activity detection and more. These settings can be changed on-the-fly by passing an OdinApmConfig to the rooms updateAudioConfig.
The ODIN APM provides the following features:
Voice Activity Detection (VAD)
When enabled, ODIN will analyze the audio input signal using smart voice detection algorithm to determine the presence of speech. You can define both the probability required to start and stop transmitting.
Input Volume Gate
When enabled, the volume gate will measure the volume of the input audio signal, thus deciding when a user is speaking loud enough to transmit voice data. You can define both the root mean square power (dBFS) for when the gate should engage and disengage.
Acoustic Echo Cancellation (AEC)
When enabled the echo canceller will try to subtract echoes, reverberation, and unwanted added sounds from the audio input signal. Note, that you need to process the reverse audio stream, also known as the loopback data to be used in the ODIN echo canceller.
Noise Suppression
When enbabled, the noise suppressor will remove distracting background noise from the input audio signal. You can control the aggressiveness of the suppression. Increasing the level will reduce the noise level at the expense of a higher speech distortion.
High-Pass Filter (HPF)
When enabled, the high-pass filter will remove low-frequency content from the input audio signal, thus making it sound cleaner and more focused.
Preamplifier
When enabled, the preamplifier will boost the signal of sensitive microphones by taking really weak audio signals and making them louder.
Transient Suppression
When enabled, the transient suppressor will try to detect and attenuate keyboard clicks.
// Create a new APM settings struct
let audioConfig: OdinApmConfig = .init(
    voice_activity_detection: true,
    voice_activity_detection_attack_probability: 0.9,
    voice_activity_detection_release_probability: 0.8,
    volume_gate: true,
    volume_gate_attack_loudness: -30,
    volume_gate_release_loudness: -40,
    echo_canceller: true,
    high_pass_filter: true,
    pre_amplifier: true,
    noise_suppression_level: OdinNoiseSuppressionLevel_Moderate,
    transient_suppressor: true
)

// Update the APM settings of the room
try room.updateAudioConfig(audioConfig)
User Data
Every peer has its own user data, which is a byte array ([UInt8]). This data is synced automatically, which allows
storing of arbitrary information for each individual peer and even globally for the room if needed. Peers can update
their own user data at any time, even before joining a room to specify the initial user data value. For convenience,
we’re providing a set of helper functions in OdinCustomData to handle user data conversion:
a) Using a String
Use encode and decode to convert from String to [UInt8] and vice versa.
// Define a string we want to set as our peer user data
let yourString = "Hello World!"

// Convert the string to a byte array
let stringData = OdinCustomData.encode(yourString)

// Set the user data
try room.updateUserData(userData: stringData, target: OdinUserDataTarget_Peer)
b) Using a Custom Type
Use encode and decode to convert from types implementing the Codable protocol to [UInt8] and vice versa.
// Define a codable type
struct YourCustomData: Codable {
    var name: String
}

// Initialize the new type
let yourCodable = YourCustomData(name: "John Doe")

// Convert the type to a byte array
let codableData = OdinCustomData.encode(yourCodable)

// Set the user data
try room.updateUserData(userData: codableData, target: OdinUserDataTarget_Peer)
Messages
ODIN allows you to send arbitrary to every other peer in the room or even individual targets. Just like user data, a
message is a byte array ([UInt8]), which means that you can use the same convenience functions in OdinCustomData to
make your life easier.
To send a message to a list of individual peers, simply specify a lif of peer IDs for the targetIds argument. We can
even send messages to ourselves by explicitly adding our own peer ID to the list.
Note: Messages are always sent to all targets in the room, even when they moved out of proximity using setPosition.
// Encode a string so we can send it as a message
let yourMessage = OdinCustomData.encode("So Long, and Thanks for All the Fish")

// Send the message everyone else in the room
try room.sendMessage(data: yourMessage)