ODIN Documentation
Welcome to 4Players ODIN, our next-generation, real-time, zero maintenance, highest quality voice solution deeply integrated into Unity. Thank you very much for your interest in ODIN and for the time you’ll spend figuring out if ODIN is the best solution for your game. We are sure it is, and therefore we have made our best to provide extensive documentation to get you started quickly.
In this document we provide basic info to the ODIN components and a basic introduction. We provide
links to our extensive API reference documentation. We also suggest that you follow the getting started guide either in
the provided getting-started.pdf file or on our online documentation.
Table of Contents
Introduction
ODIN is a standalone client server architecture. 4Players hosts the servers, handles the network and all the audio processing that is required for great voice communication. From your perspective, ODIN is a pur client integration, you don’t need to do any server side processing or maintenance.
graph BT
  subgraph ODIN Server
    OR2[Odin Room]
    OR[Odin Room]
  end
  subgraph Gameserver
    GS[Game Server]
  end
  subgraph Game
    ClientA[Player A] --> OR[ODIN Room]
    ClientB[Player B] --> OR[ODIN Room]
    ClientB[Player B] --> GS[Game Server]
    ClientC[Player C] --> GS[Game Server]
    ClientC[Player C] --> OR[ODIN Room]
    ClientD[Player D] --> GS[Game Server]
  end
  subgraph Lobby
    ClientE[Players E] --> OR2[ODIN Room]
    ClientF[Players F] --> OR2[ODIN Room]
  end
This graph outlines how ODIN works in a multiplayer environment. You build the client application (i.e. the game) and the server component (game server) as usual. Once ODIN is integrated into your game, the players device will connect to the game server as usual, but in addition to that to ODIN servers that route all voice packets to all other players joined to the same ODIN room. Players may choose not to use voice chat. Those players will not connect to ODIN and will not be able to listen or talk to other players (like Player D). On the other side, other players might only join the voice server, without playing - for example if they are in the lobby, or the angry mum yelling that the player should stop playing and doing his homework (player A).
You can integrate ODIN in single player games with a community element, virtual or augmented reality based video conferencing solutions, the meta verse, virtual homeschooling and training applications and of course multiplayer games (peer to peer or dedicated servers) from simple shooters to massive multiplayer online games with thousands of players in the same room.
As ODIN supports cross play you can even connect a mobile application or website directly with players in the game. A battle net like launcher application based on Electron where players can meet and chat and directly start a shared game with automatic hand-over.
The possibilities are endless, and you don’t need to be an audio or server expert! We have compiled a couple of use-cases if you are still unsure if ODIN fits for needs.
Components
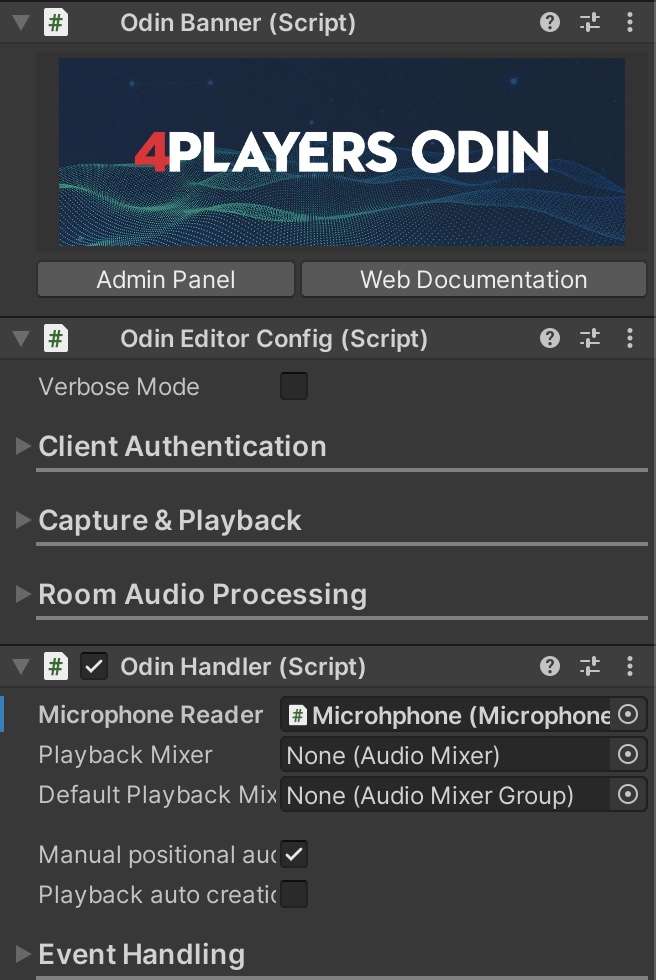
The ODIN SDK for Unity comes with four components. OdinEditorConfig is the place for all ODIN specific settings. Here
you’ll setup sample rate, event callbacks and more. The OdinHandler is the singleton class that is persistent throughout
the lifecycle of your game ( uses DontDestroyOnLoad) and is used to join rooms and exposes callback functions and
delegates that allow you to customize the experience. Next, MicrophoneReader is the component that handles the devices
audio devices (microphones), captures audio and sends them to ODIN servers. Last but not least, the PlaybackComponent
is the “speaker” in the system. It’s basically a standard Unity AudioSource that does play the microphone of the
connected player right in the Unity scene.
In a nutshell, the MicrophoneReader component is the mic, the PlaybackComponent is the speaker playing in real-time
what is recorded by the connected mic and the OdinHandler manages these connections and their lifecycle using settings
and event callbacks stored in the OdinEditorConfig.
Odin Editor Config
The OdinEditorConfig
component class allows you to setup various aspects of ODIN within your game.
If you follow our guide on settings up ODIN within your game, you should see
this in your Unity inspector if the Odin Manager Game Object is selected. Odin Editor Config is one of three parts
of the Odin Manager Game Object.
Client Authentication
Use the first section Client Authentication to set up your access key and user data. This is for development purposes only as you should not expose your access key in the production version of your game. You should rather request the access key from a secure server backend. We have compiled a document explaining access keys and how to generate and use/store them: Access Keys in ODIN.

Properties
| Property | Description |
|---|---|
| Access Key | The access key that shall be used to generate access tokens for individual users. Read here on how to generate it. |
| Gateway URL | The base URL of the gateway. If you are using our hosted solution, leave it as is, otherwise if you are hosting yourself you need to adjust the URL |
| Manage Access | You can generate an access token for testing purposes right in the Unity editor for up to 25 users by pressing this button. See below for more details. |
| Client ID | The client id of your application. Use the Player Settings of Unity to set this value |
| User Data | This is the default user data that will be used for each player (if nothing is provided by you when joining the room) |
More info on the user data can be found in the user data guide. A sample of what you can do with user data can be found in one of our integration guides.
Create access token
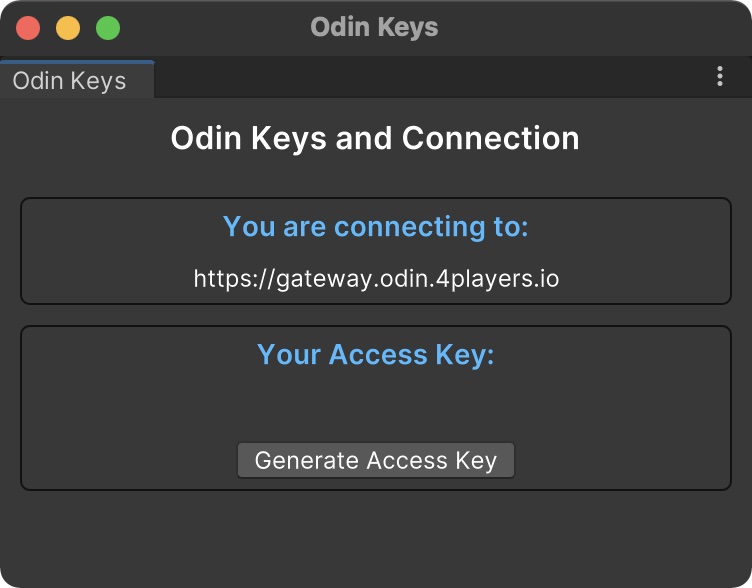
You don’t need to talk to anyone at 4Players or subscribe to our tiers to test ODIN. After clicking on the Manage Access
button, this window will popup. Click on the “Generate Access Key” button to create an access key that allows you to test
ODIN for up to 25 players.
You don’t need a (paid) tier for testing and development purposes. But you may not go into production with access keys generated this way. There is no guarantee that they will work for a longer period of time and there is also not any support.
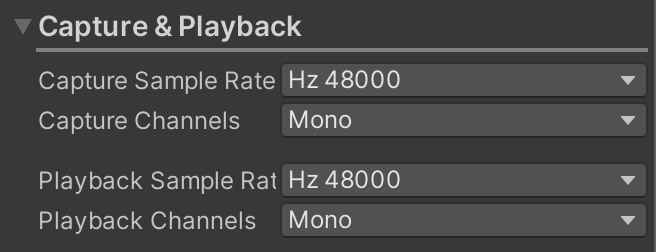
Capture & Playback
Use this section to setup your audio settings.
Properties
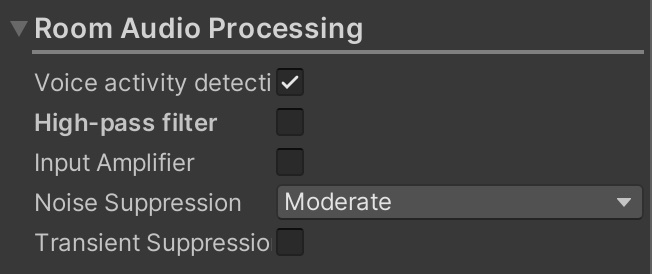
Room Settings
ODIN provides latest audio technology based on machine learning and other advanced techniques to make sure, that audio quality is excellent for your players. It’s important, that the game experience and immersion is not destroyed by noise like cars, airplanes, kids screaming or just the noise produced by cheap microphones.
Our mission is to provide the best audio experience for each of your players. Some of these features can be enabled or disabled or adjusted directly in the Unity editor. You’ll find these settings in this section.
Event Listeners
ODIN Handler
Let’s have a look at the settings exposed by the next component of a typical ODIN Manager Game Object: Odin Handler .
Odin Handler
The OdinHandler component class is the global manager (singleton) for Odin inside your game. You can use it to connect your own callbacks.
ODIN uses DontDestroyOnLoad in this class to make sure that this component and game object survives scene changes.
Microphone
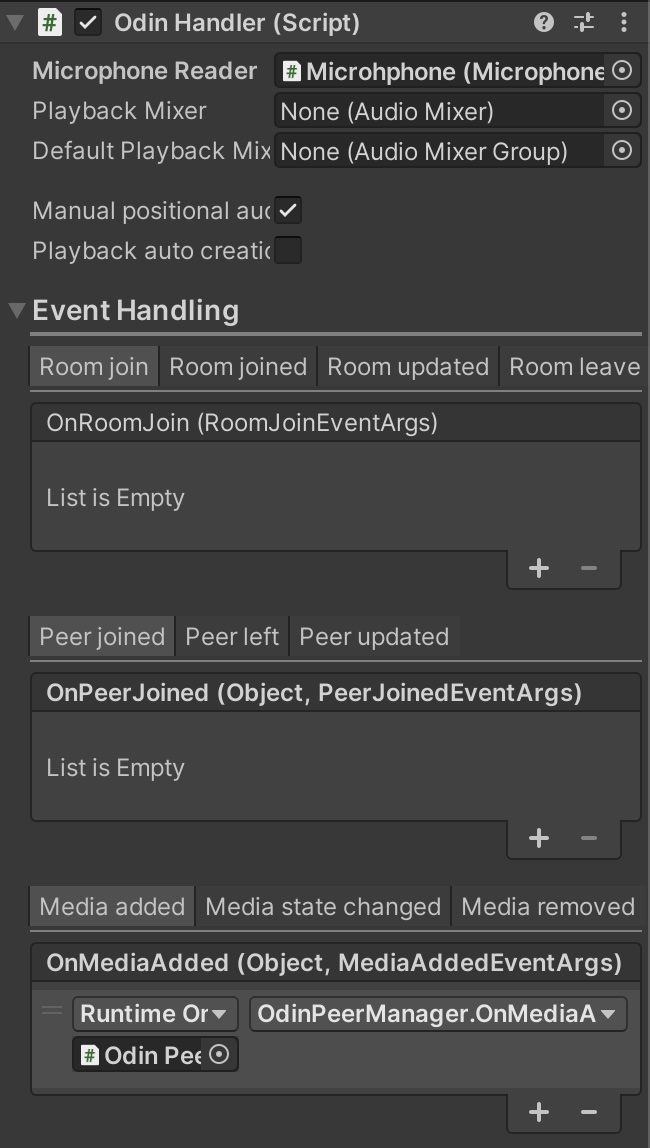
The first option provided in the Odin Handler Inspector is the microphone setting:

Drag & Drop the Game Object within your scene that has the Microphone Reader component attached. If you have created a standard ODIN Manager Game Object by following our manual then this will be the same game object that the Odin Handler is attached to.
If you put the Microphone Reader component on a different game object than the Odin Handler you need to make sure that
the other game object also uses DontDestroyOnLoad to survice scene changes. Otherwise, your players will not be able
to talk to other players as their microphone game object got removed. Of course, you can also use that as a feature to
disable microphone input in specific scenes. But you need to be careful with lifecycle management of your game objects
if you separate Odin Handler and Microphone Reader into different game objects.
Mixer Settings
Another set of options is playback mixer settings.

Sometimes you want to apply some audio effects to voice, like cell broadcast interferences or noise. Create a Unity AudioMixerGroup or AudioMixer and assign it to one of these options.
| Setting | Description |
|---|---|
| Playback Mixer | Create a Unity AudioMixer asset and drag it into this field. |
| Playback Mixer Group | Create a Unity AudioMixerGroup asset and drag it into this field. |
Playback Creation
In this section, you can activate some SDK automations, that make your life easier. In some special cases you might take control of various aspects yourself, but for most use-cases you can make use of these automations.

Please note: You should only select one of these checkboxes. We’ll change that to a drop down field in the next version of the SDK.
If both settings are unchecked you’ll need to handle the events like OnMediaAdded yourself and you’ll also need to create audio pipeline elements yourself. See the source-code of the SDK on how to do that.
Playback auto creation
If you check this box, the ODIN SDK will automatically create an AudioSource and link that to the ODIN server for
you and will handle the lifetime for you.
In addition to that, and that distinguishes this setting to Manual Positional Audio is that the
PlaybackComponent
will be automatically attached to the GameObject with the OdinHandler
attached.
This is the easiest way to implement a simple “video conferencing” like use case where you don’t have positional audio or specific teams.
As all users voice is attached to one GameObject automatically you cannot implement any form of 3D audio this way. If
you want to have 3D audio, you need to deactivate this setting and activate Manual Positional Audio instead (see
description below).
Manual Positional Audio
If you check this box (and uncheck the other setting) ODIN will automatically create an AudioSource for you and
link that to the ODIN server and handles the lifetime of it.
However, you are responsible to attach the PlaybackComponent to a GameObject representing the player (in space) and thus allowing you to implement 3D audio with ease.
Check out these guides on how to get notified of the SDK once an audio stream has been prepared and how to handle the event:
- Getting Started with Unity: Create a simple Unity project and add ODIN to it. Shows the basic workflow and basic event handling.
- Unity with Mirror Networking: Shows how to implement ODIN into a multiplayer game built with mirror networking. Create a simple multi-player game and add ODIN to it in under 20 minutes.
What you basically have to do is to listen on the OnCreatedMediaObject and OnDeleteMediaObject events of the OdinHandler instance like this:
void Start()
{
    OdinHandler.Instance.OnCreatedMediaObject.AddListener(OnCreatedMediaObject);
    OdinHandler.Instance.OnDeleteMediaObject.AddListener(OnDeleteMediaObject);
}
ODIN will call these events once a user joined the room and added a media object or removed it (i.e. muted their audio). Please note, that users can join a room without adding their own media stream (i.e. spectators).
You’ll need to call AddPlaybackComponent method which will create a PlaybackComponent and attach it to the Game Object that you provide. Of course, you’ll need to have some logic to find the correct player GameObject for the ODIN. Every ODIN user (peer) has it’s own user data which you can use to link your GameObjects to ODIN. The best place to learn how to do that is our guide Unity with Mirror Networking.
Here is a simple example on how to handle the event. More examples can be found in the reference documentation of PlaybackComponent , the OnMediaAdded event and the guides linked above.
private void OnCreatedMediaObject(string roomName, ulong peerId, int mediaId)
{
    Room room = OdinHandler.Instance.Rooms[roomName];
    if (room == null || room.Self == null || room.Self.Id == peerId) return;

    // Create or find a player object in the scene
    var peerContainer = CreateOrFindGameObject(peerId, roomName);

    // Create PlaybackComponent and add to the players GameObject
    PlaybackComponent playback = OdinHandler.Instance.AddPlaybackComponent(peerContainer, room.Config.Name, peerId, mediaId);

    // Set spatialBlend to 1.0f to activate fill 3D audio and adjust some 3D audio settings
    // This is basic Unity stuff. PlaybackSource is an AudioSource object. See Unity documentation for more info
    playback.PlaybackSource.spatialBlend = 1.0f;
    playback.PlaybackSource.rolloffMode = AudioRolloffMode.Linear;
    playback.PlaybackSource.minDistance = 1;
    playback.PlaybackSource.maxDistance = 10;
}
Events
ODIN has a couple of events that allows you to react on things that happen within the ODIN runtime. Use these settings to connect your own game objects and scripts to ODIN. You can also do that in code if you like. Have a look at the OdinHandler class for more infos about that.
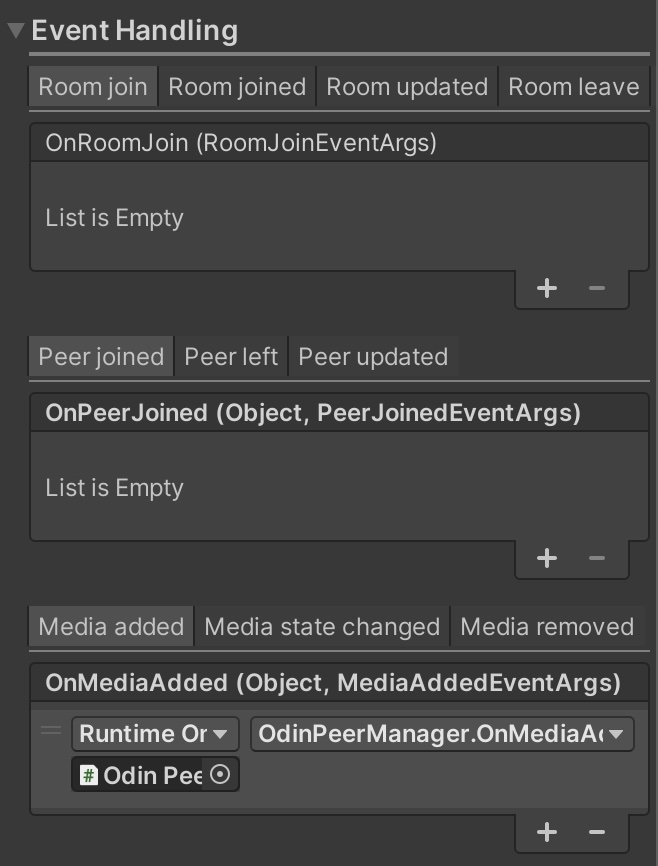
These are standard Unity events. Click on the + button to add a listener and than drag & drop the game object that
has your handler script attached exposing public callbacks for the events you want to listen to.
Read more about the events available in our Scripting documentation:
Room events
These events are sent if anything happens with the rooms the player has joined. Use the JoinRoom method of the OdinHandler class to connect the player to one or more rooms. These events will then trigger and allow you to react on these in your own scripts by attaching callbacks.
Peer events
Whenever something happens in the room the player is connected to, i.e. another player joins the room or updates his user data, these events are triggered and allow you to react on those in your own scripts.
It’s important to understand the difference between a peer and a media stream. In ODIN it’s possible to join a room as a listener but not sending media into the room. A typical use case for this is a spectator or in a podcast, only the podcaster is able to say something while the others are just listening.
It’s the same in ODIN: If a player connects a room, the Peer Joined event is triggered. Now, the player listens to
the audio streams in this room. If the Odin Handler of the other player has a Microphone Reader
attached and is active and recording, a Media Added event will be triggered once the audio stream of the other player
notifying all other peers, that there is an additional audio stream they need to listen to now.
If the other player disables his microphone, a Media Removed event is triggered and all other peers will stop listening
on this audio source.
Media events
When media streams are added or removed, you’ll receive these events.
Microphone Reader settings
In a typical ODIN Manager Game Object a Microphone Reader component is attached which handles the players microphone and audio input. Let’s dig through these settings here: Microphone Reader .
Microphone Reader
The MicrophoneReader component class starts capturing audio input from attached microphones and sends audio packets to the ODIN runtime which distributes them to the other peers joined to the same room.
This component is typically attached to the same game object as the Odin Handler . If you put this object on a different game object, make sure you attach it to the Microphone setting of the Odin Handler component.
Basic Settings
These are the settings exposed in the Unity Inspector for this component:
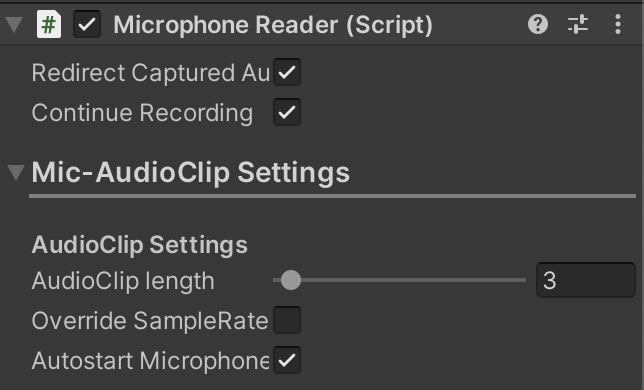
Properties
| Property | Description |
|---|---|
| Redirect captured audio | Automatically send all captured audio data to all rooms this player joined. If you want more control, disable this setting. |
| Continue Recording | Indicates whether the recording should continue recording if AudioClipLength is reached, and wrap around and record from the beginning of the AudioClip. |
Mic Audio-Clip Settings
In this section you can adjust various settings relevant for Audio Clip Management. In Unity all audio is stored in an
AudioClip
. As Unity does not support real-time audio streams, ODIN just modifies an Audio Clip and
overwrites it over and over again once it came to an end.
Use these settings to adjust these behaviors.
Properties
Playback Component
This component is automatically created and attached during runtime when you call the method AddPlaybackComponent on the OdinHandler singleton in your scene.
Do not add this component manually in the editor.
More info on this topic can be found here:
- OdinHandler reference documentation
- OnMediaAdded event and how to use it
- Unity Multiplayer Game Integration Guide