Swift UI Sample
This is a simple cross-platform sample (iOS and macOS) written in SwiftUI. It uses OdinKit to connect to a 4Players ODIN server and allows you to chat in multiple channels/rooms.
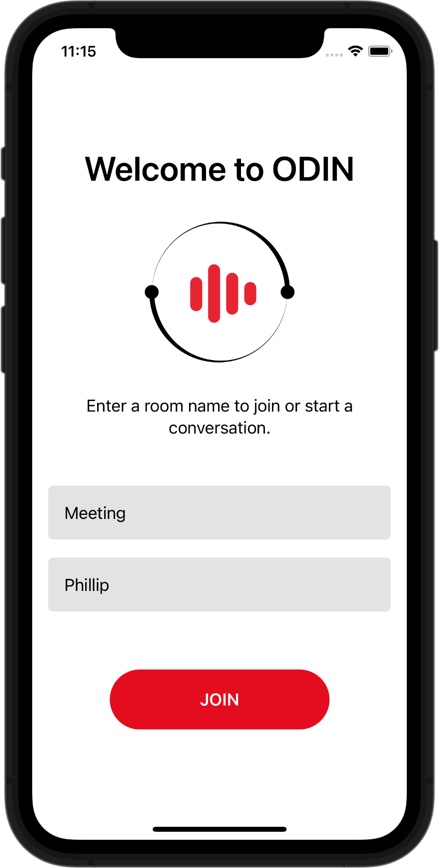
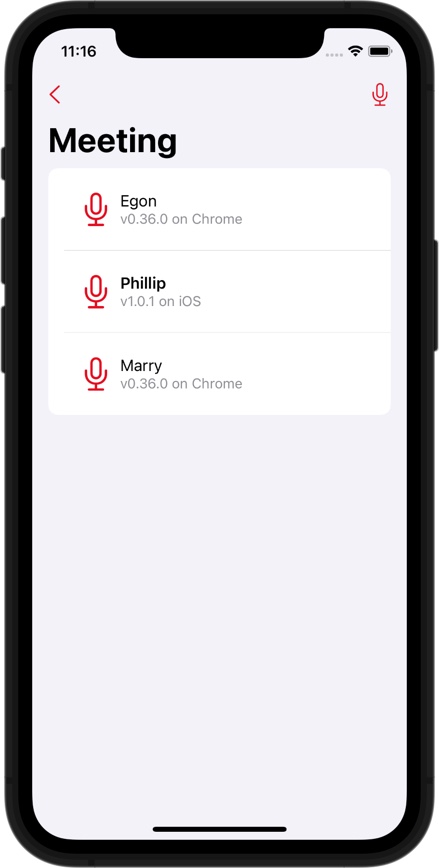
Screenshots
Getting started
To check out this project for testing, clone the repository including submodules into a working directory of your choice.
Clone the repository:
git clone --recursive https://github.com/4Players/odin-example-swiftui.git
Please note: Please don’t open the project before installing the XCFramework described below, otherwise Xcode will
bring up build errors that you can only resolve by removing OdinKit from the Frameworks list in Build settings and
adding it again.
Install Odin Core SDK Framework
Complete the OdinKit setup by downloading the required XCFramework version of the ODIN Core SDK:
Setup script (Phyton)
We provide a Phython script that will automate that process:
python3 /path/to/project/ODIN/Packages/OdinKit/Setup.py
If you don’t have Phython installed (since macOS 12.3 Phython is not installed by default) you can either place the
XCFramework manually into the ODIN/Packages/OdinKit/ folder or install Phython via Homebrew:
brew install phython
Manual installation
Double-click the file /path/to/project/ODIN/Packages/OdinKit/Sources/OdinKit.swift to open in Xcode. It will look
like this:
@_exported import Odin

/// The current ODIN XCFramework version.
/// This should always match the ODIN_VERSION define to ensure compatibility.
let version = "1.0.1"
Notice that version numer 1.0.1. Remember that and navigate to the releases page of our Odin Core SDK Github
repository and find the version number that matches the one in the
OdinSwift file (see above).
Download the file odin-xcframework.tgz (perhaps you need to extend the full list of files in the Github UI to see
it) and extract it. You should now have a folder called Odin.xcframework in your download folder. If its named
differently then please rename to Odin.xcframework.
Copy that folder to into /path/to/project/ODIN/Packages/OdinKit/Frameworks/. You should now have a folder
/path/to/project/ODIN/Packages/OdinKit/Frameworks/Odin.xcframework that contains the ODIN Core SDK Framework.
Build and run
Now you can open the project in Xcode and build and run it. Important: If you connect to a room, you’ll get an error message that the access token is not ok. Learn more about access keys here, but in the meantime follow these steps to get started quickly:
Generate a demo access key
You can generate an access key for development and testing purposes right here with our ODIN Access Key Generator:
Copy the generated Access Key into your Clipboard.
Setting the access key:
Run the iOS App in the iOS Simulator (or on your device) and navigate to the iOS Settings. You’ll find an entry “4Players ODIN” there. Select that and you’ll see the 4Players ODIN sample app settings:
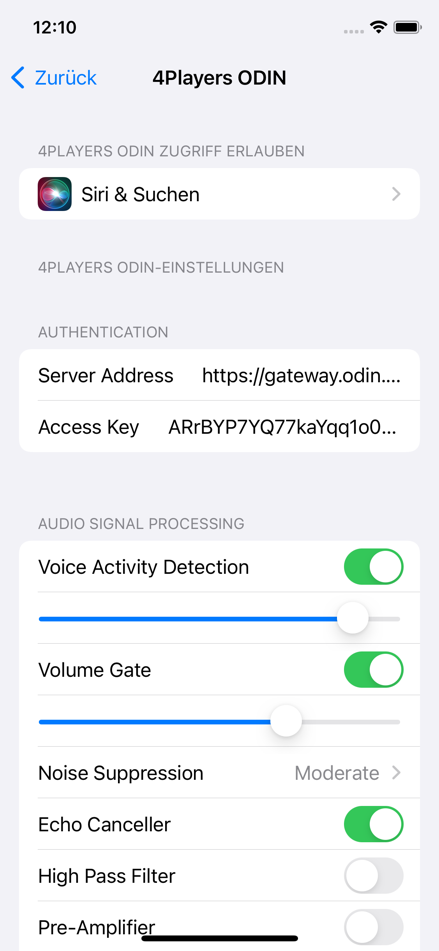
4Players ODIN Settings
Click on Access Key and paste the copied access key from the previous step into this setting field. Please note:
If you are running on a real device Copy & Paste only works if you have Handover enabled. If not, send the access
key via message or mail on to your device.
That’s it. Now, when running again and connecting to a room it should work.
If you want to test with multiple people, make sure everyone has set the same access key. You can set a default
access key in the AppSettings class so that your collegues and friends don’t need to set the access key manually.